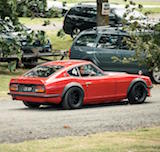
Red Zed Build Thread

Hey there. I've just redone the tank on my Z32. Linkup have a fuel tank sealant that might be worth some attention. Its a POR product, stir it up, tip it in, slosh it about. It seal any holes they've missed, deal with any corrosion etc. Its an epoxy, single pack. I cured a hole in mine between that and some knead it (someone had used a dodgy screw and put a hole in it) but in retrospect, I wish I'd had the time to seal all the bottom of the tank and sides with it etc.
It cost about $25 from memory, I bought a 250mL can. For all the trouble you're going to, it might be well worth it.
It cost about $25 from memory, I bought a 250mL can. For all the trouble you're going to, it might be well worth it.

mods to fuel tanks need to be checked by a certifier I believe. I need to get mine looked after doing something very similar.
You're probably right. I'll obviously be going though a certifier for all the other stuff so he can just add it to the list!nzeder wrote:mods to fuel tanks need to be checked by a certifier I believe. I need to get mine looked after doing something very similar.
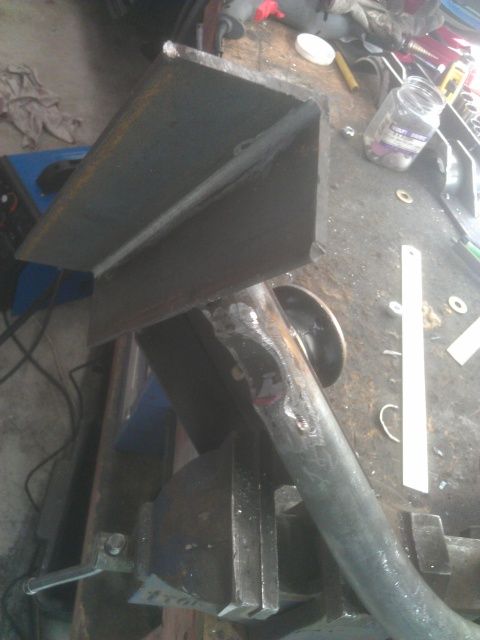
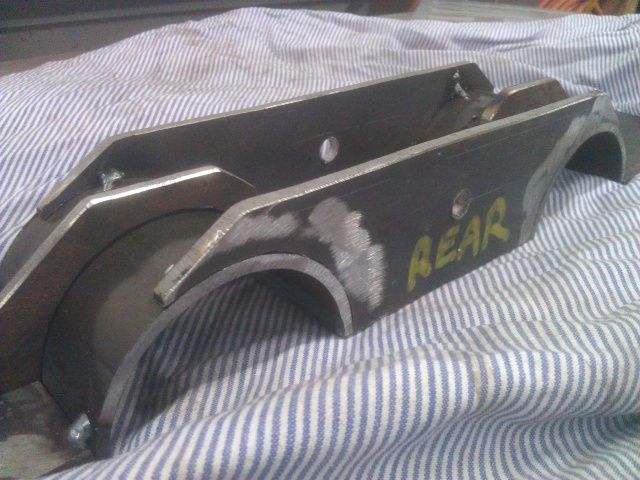
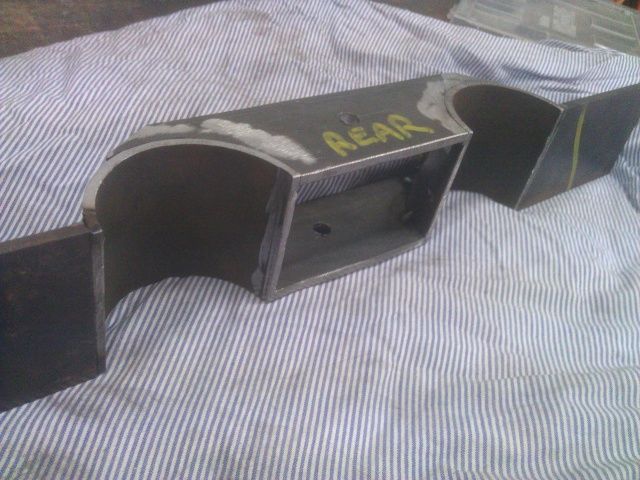
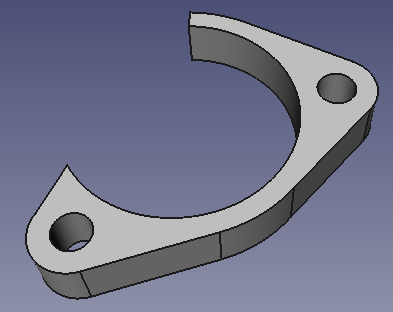
A mate made me this sweet bend and tacked up my mounts. Everything came out minty. The isolators are 35mm x 70mm from a Ford something.
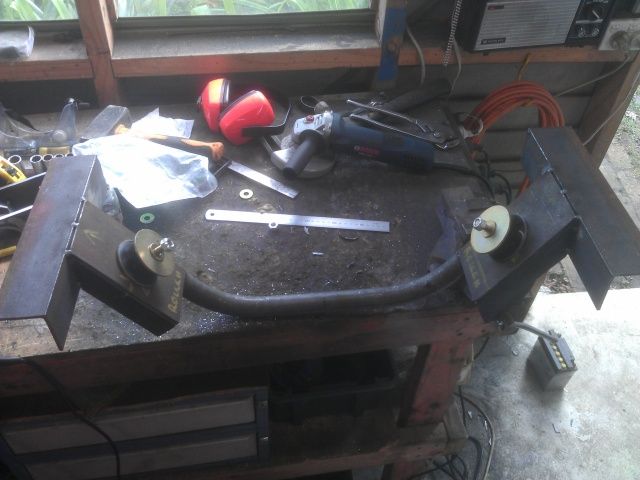

I had to notch the back of the pipe to clear the TC mounts.
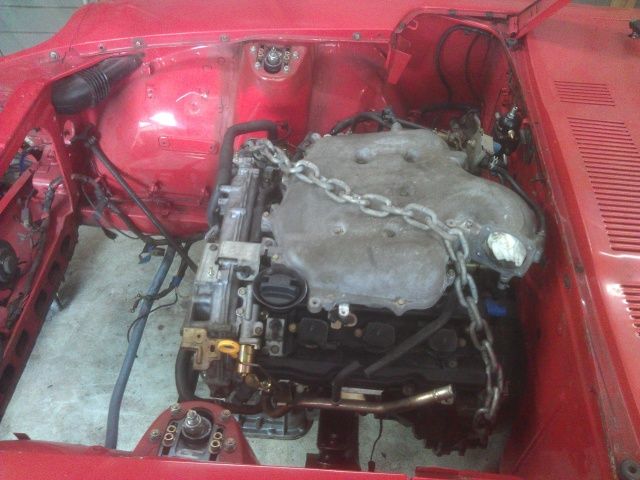
And this is how everything sits.
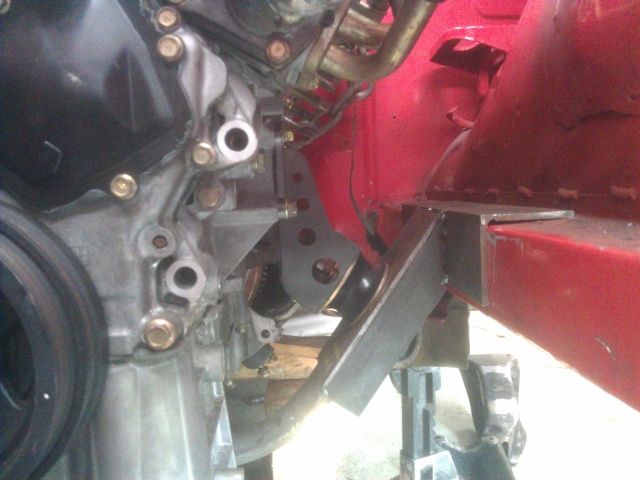
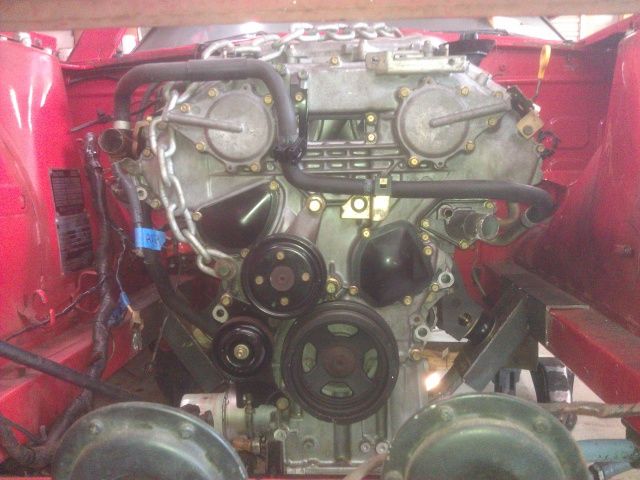
Shed loads of room up front!
This morning I whittled up the g-box mount. The two cut-outs are for twin 2.5" exhausts. The hole in the middle is for the one bolt which goes through the stock isolator.
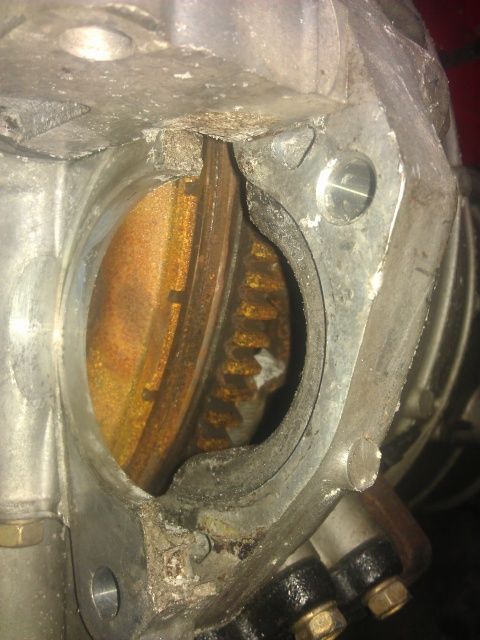
Some baboon (not me!) broke off some casing around the starter so I'll get this cut to fill the void.
That's about it. I'll be stoked once the mounts are permanently in the car! But that feels a way off.
I've got some clearance issues with the headers which I've started to cut up so I can put Humpty Dumpty back together again but with more clearance. Those photos are too scary/embarrassing to publish. I think I'll mock them up and take them to TTT Automotive to TIG. Hopefully they don't laugh out loud!
I'm also gonna have to add another uni and hanger bearing to my steering shaft so I can clear everything more comfortably. I don't know what's available for this so I guess I'll have a poke around Pick-A-Part.
I had to notch the back of the pipe to clear the TC mounts.
And this is how everything sits.
Shed loads of room up front!
This morning I whittled up the g-box mount. The two cut-outs are for twin 2.5" exhausts. The hole in the middle is for the one bolt which goes through the stock isolator.
Some baboon (not me!) broke off some casing around the starter so I'll get this cut to fill the void.
That's about it. I'll be stoked once the mounts are permanently in the car! But that feels a way off.
I've got some clearance issues with the headers which I've started to cut up so I can put Humpty Dumpty back together again but with more clearance. Those photos are too scary/embarrassing to publish. I think I'll mock them up and take them to TTT Automotive to TIG. Hopefully they don't laugh out loud!
I'm also gonna have to add another uni and hanger bearing to my steering shaft so I can clear everything more comfortably. I don't know what's available for this so I guess I'll have a poke around Pick-A-Part.
Excellent work Mikey. Re the steering just remember you are not allowed to do any welding to any steering component. You have to spline and join etc no welding this is what a cert engineer has stated and if you check a few forums this is stated over and over again too. So no welding on the steering you can use a shaft that from the factory is welded but you can't weld or anyone else for that matter - only factory welds are accepted.
Thanks Nzder. Yeah I was aware of that rule. I could almost get away with using the stock shaft but I'm pretty sure the certifier wont like the limited clearance. And if I'm crafty I'll have enough room to use the factory alternator location.
I have seen other people do what I'm thinking on a 240z, they were in the states thou, so they probably didn't need to worry about the welding rule which makes life a lot easier.
I'll poke around all the FWD cars at Pick-A-Part and hopefully something jumps out at me!
I have seen other people do what I'm thinking on a 240z, they were in the states thou, so they probably didn't need to worry about the welding rule which makes life a lot easier.
I'll poke around all the FWD cars at Pick-A-Part and hopefully something jumps out at me!
-
willythefish

- Posts: 127
- Location: Rotorua
Looking good.I will need to do something similar for my swap. Glad you are leading the way.