Page 10 of 13
Posted: Mon Jul 07, 2014 3:44 pm
by badhabit
Cheers. Yep time to do it once, do it right!
Which will now also means full new suspension setup. Thanks to nzeder my car will be rock'n AZC coilovers.
The Ground Control stuff that is almost here will be shelved in favour of already assembled coilovers.
Will be selling my tokico HP suspension setup now too.
More work on the hatch area today. Pics to follow.
Posted: Mon Jul 07, 2014 6:42 pm
by badhabit
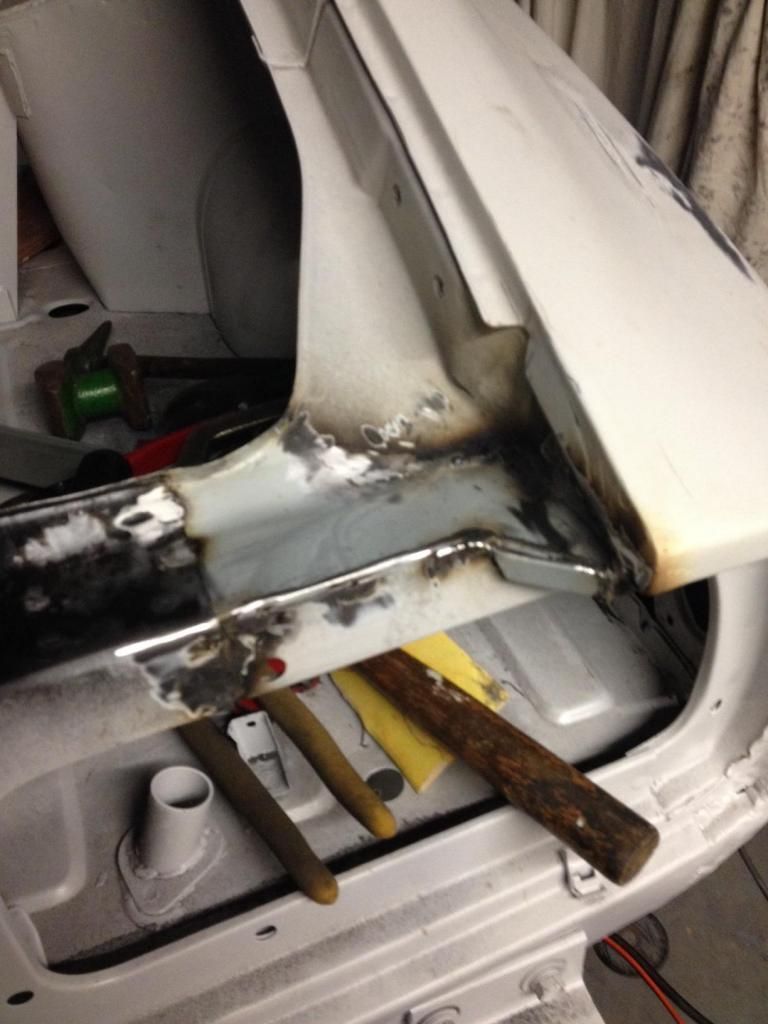
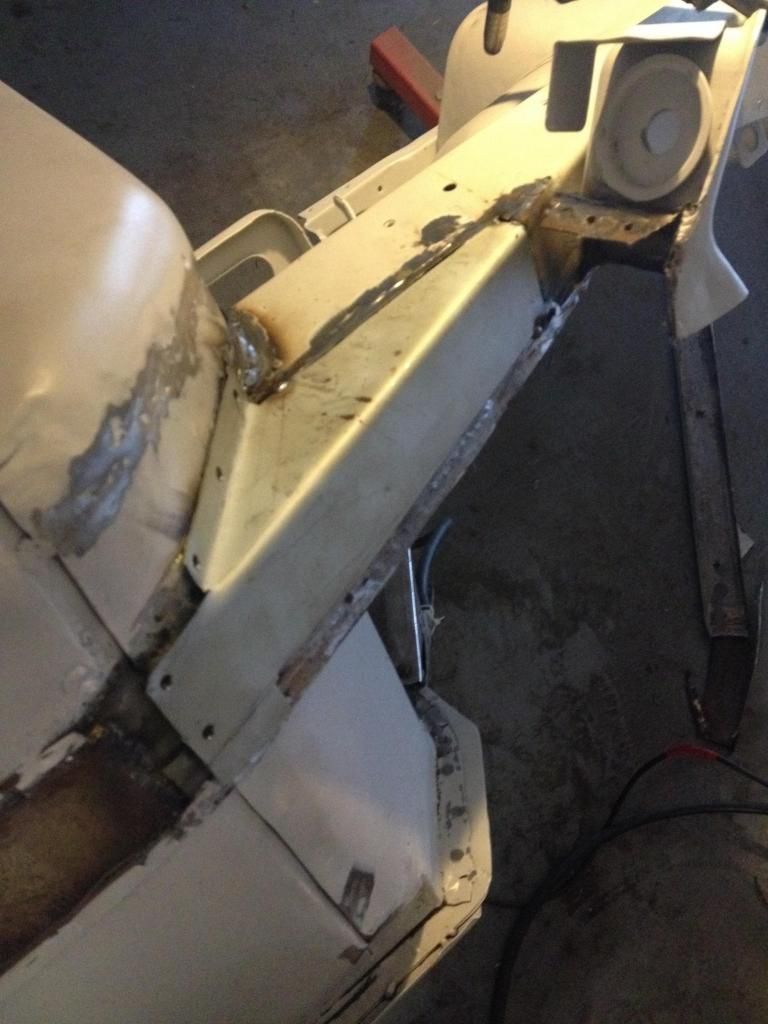
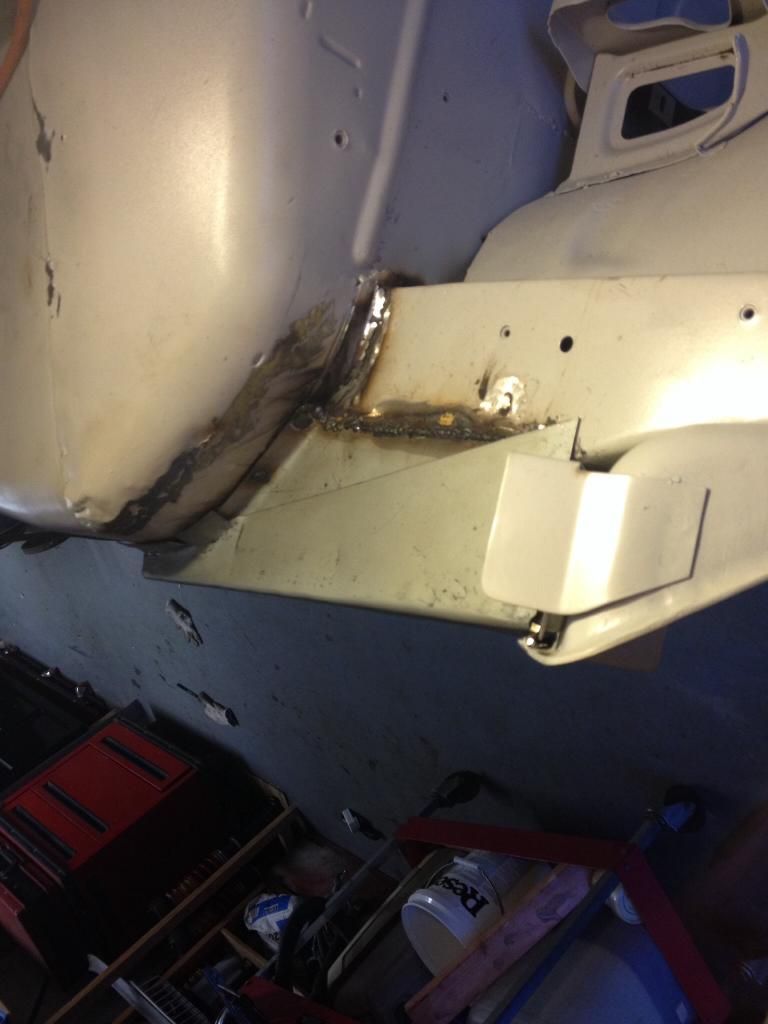
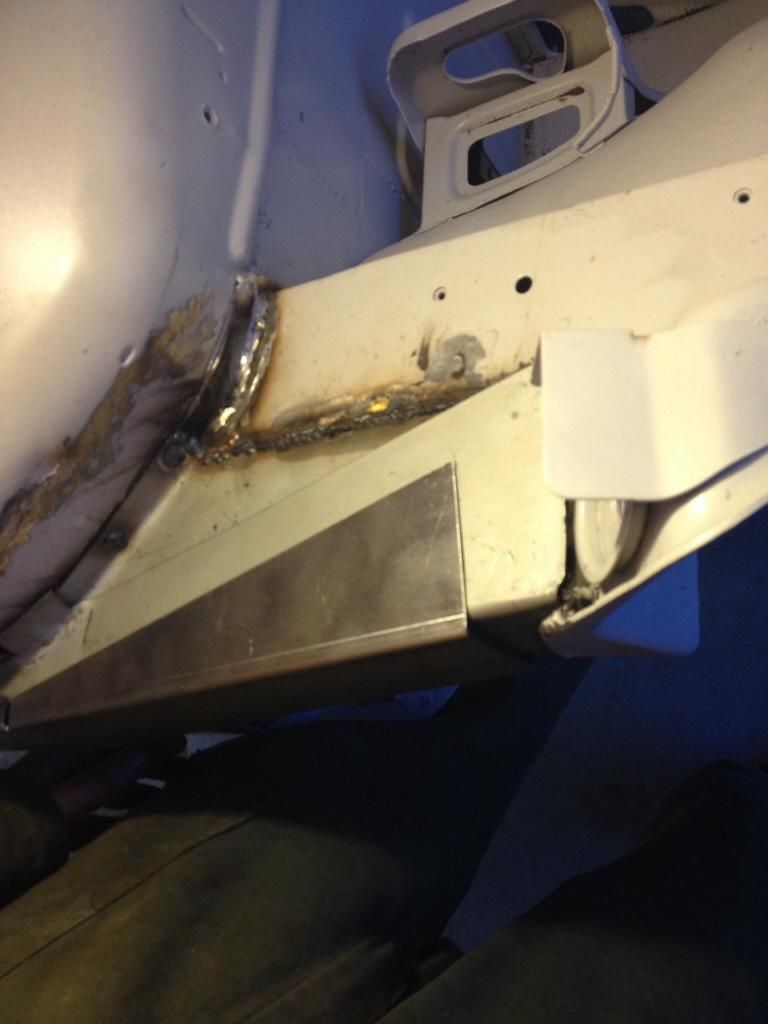
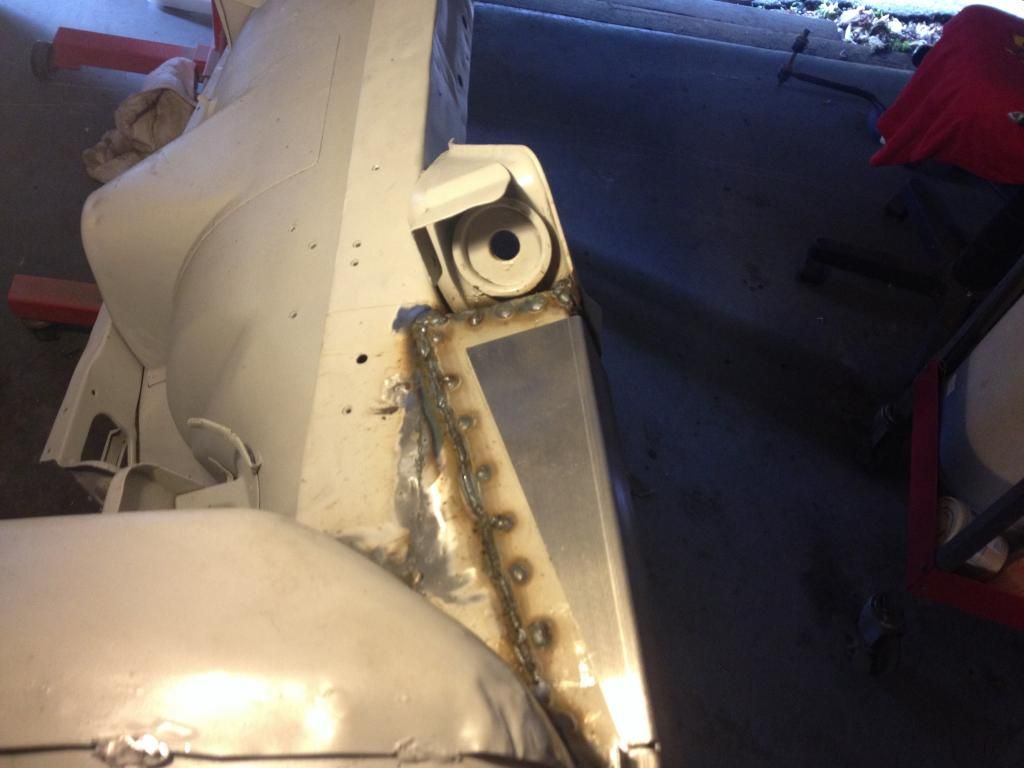
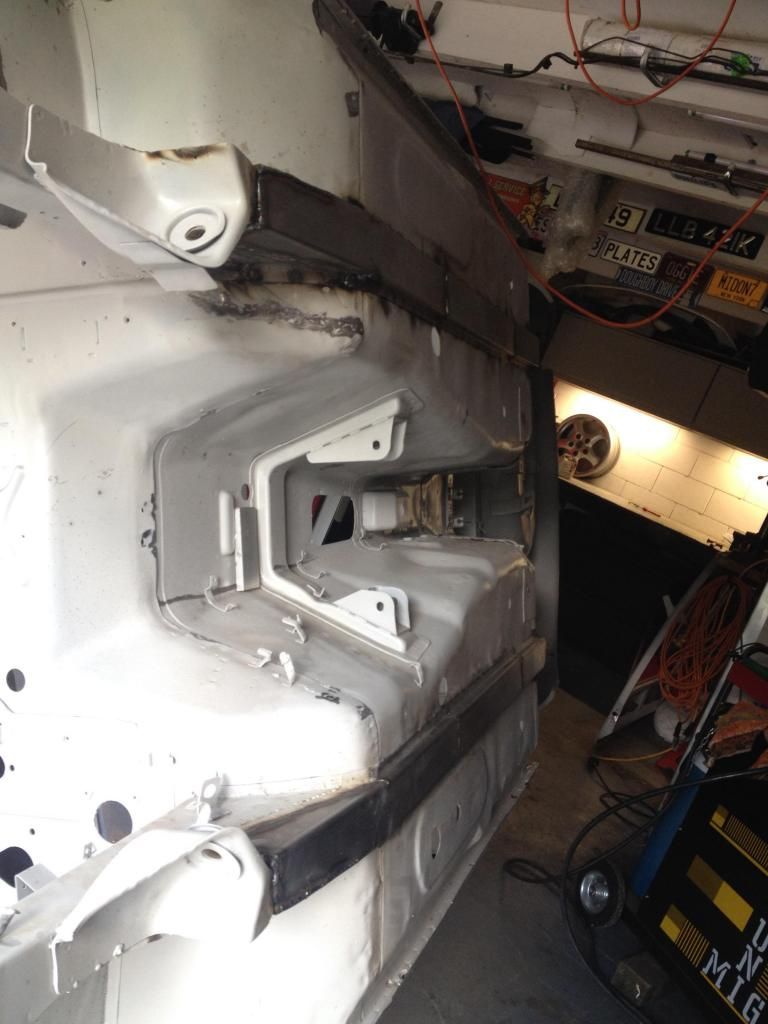
More progress.
Completed the right hand side of the hatch area.
Now ready for the finishing panel welded over it all.
Probably need to have the hatch in place to get alignment bang on. Much happier having gotten rid of a few extra hidden issues.
Posted: Fri Jul 11, 2014 1:22 pm
by badhabit
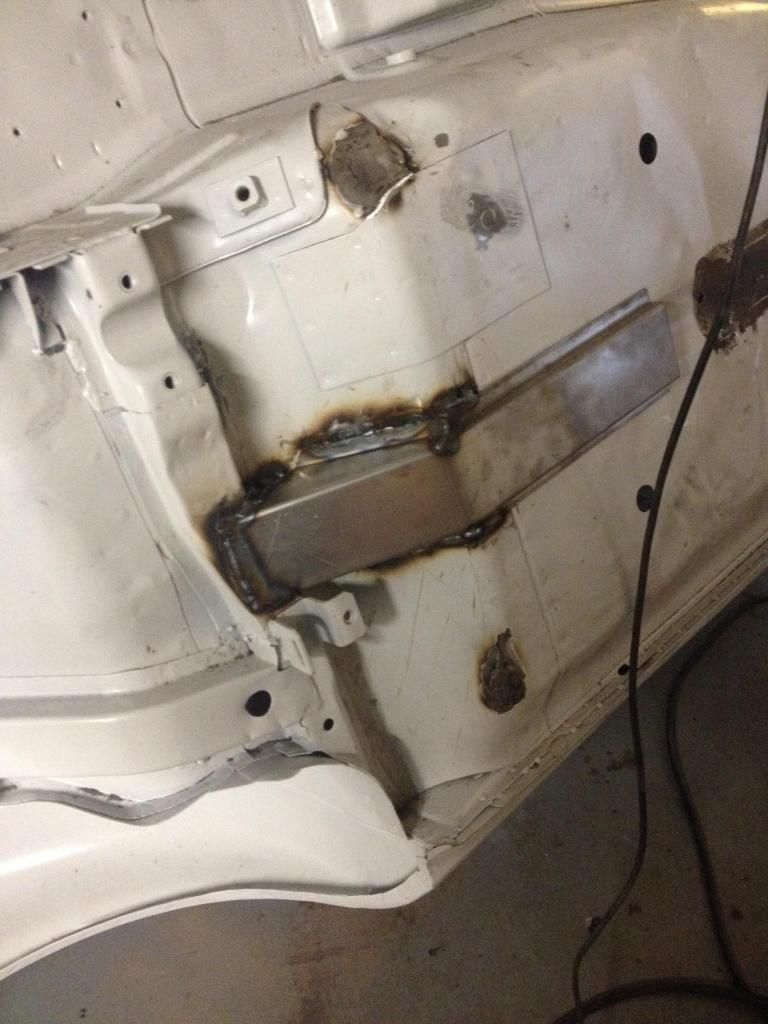
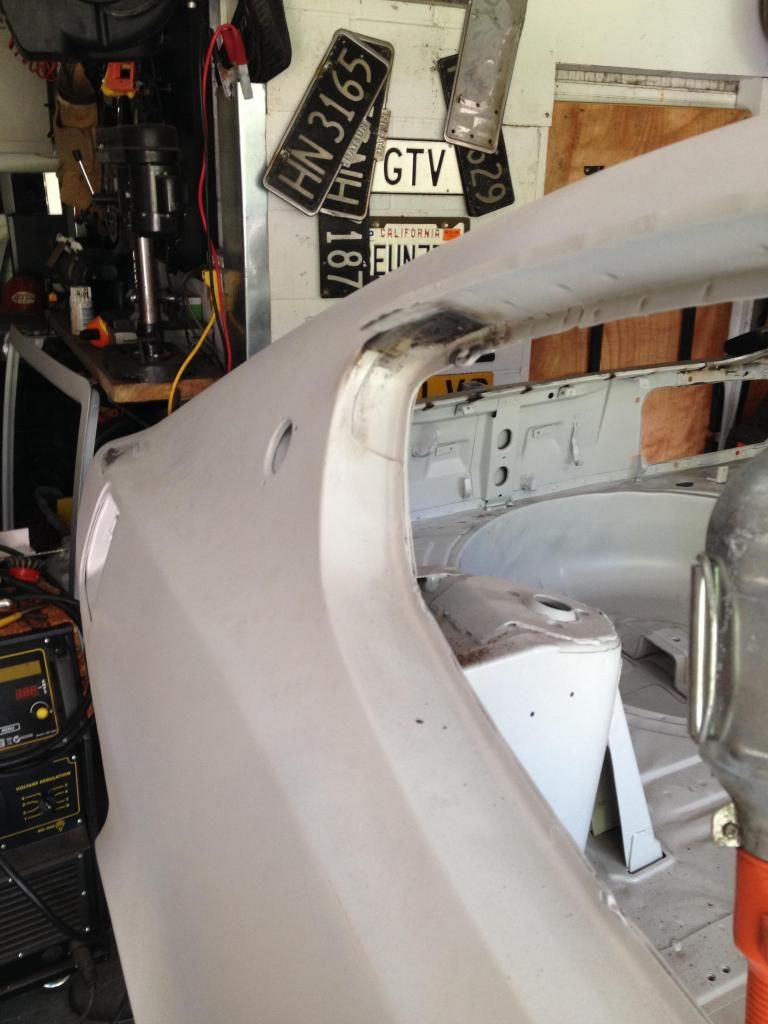
Few more steps today.
Fitted the hatch to check I was welding the 'slam' panel in the best spot.
Fitted up light panels again.
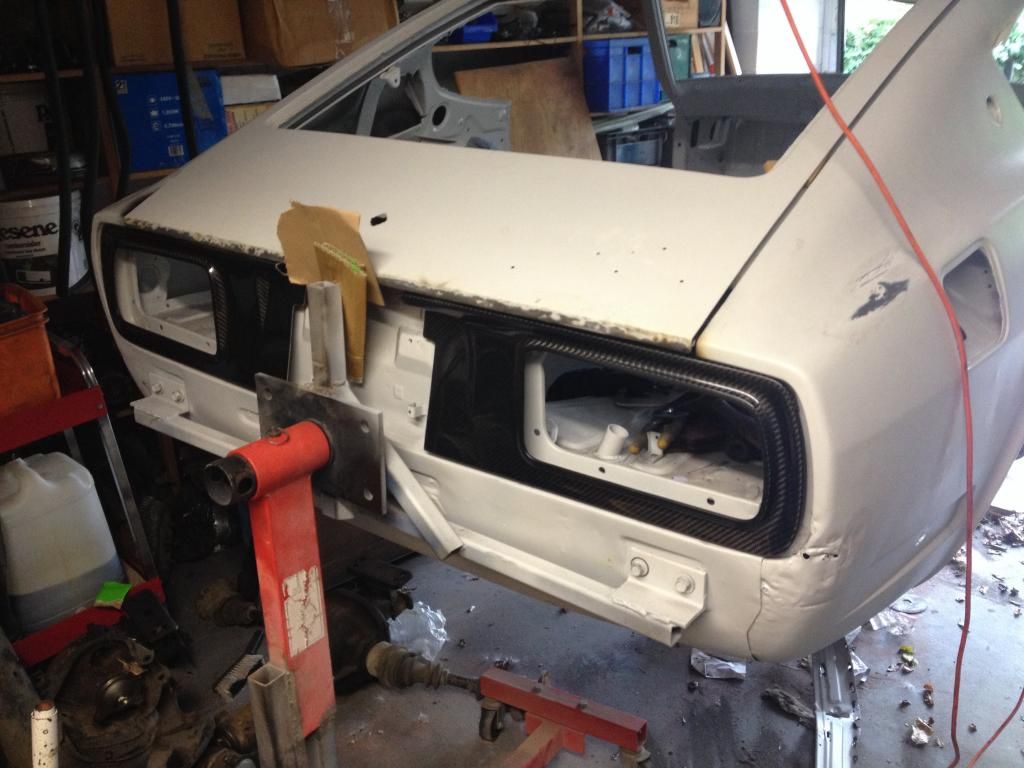
Coated the back of the new panel in a zinc rich primer, factory didn't have much to stop it rusting so anything will help. I'm going to leave the seam sealer out of the underside of the panel until I put some rustproofing squirted up underneath.
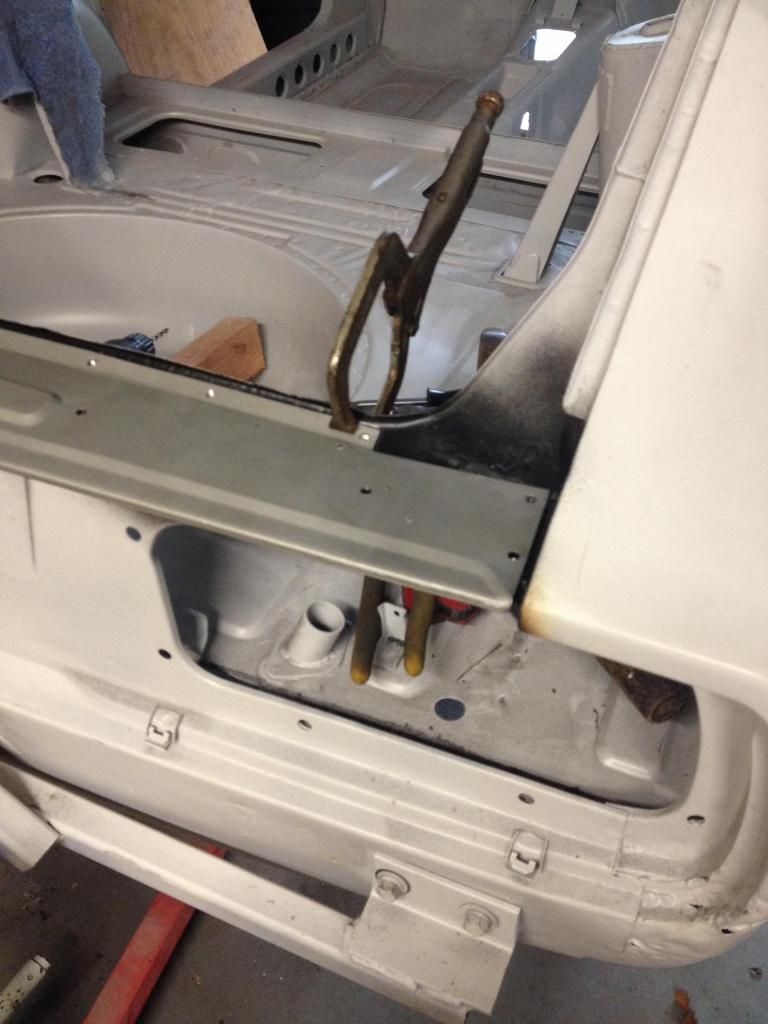
Drilled the slam panel, clamped it down, tweek up the mig and plug away!
Just have to grind her up and touch up the epoxy.
Posted: Fri Jul 11, 2014 2:09 pm
by BRONZEE
Really great to see the progress since you started this thread.

Posted: Fri Jul 11, 2014 5:10 pm
by badhabit
Cheers bronzee. I'm enjoying the hands on stuff. Going back to the desk again is not appealing at all!!
And I will join the club! I'm back at work in a couple if weeks and will do that form etc.
Next step is to clean up some welds in the boot space. Previous repairs are a bit blobby.
Chassis rails should be on here soon so I can move my way forward. Bigger job than the hatch.
Posted: Fri Jul 11, 2014 7:22 pm
by BRONZEE
badhabit wrote:Cheers bronzee. I'm enjoying the hands on stuff. Going back to the desk again is not appealing at all!!
And I will join the club! I'm back at work in a couple if weeks and will do that form etc.
Always the satisfaction of knowing that the job has been done properly when you've done it yourself.
Cool. Look forward to receiving the application.
Posted: Fri Jul 18, 2014 5:45 pm
by badhabit
Chassis rails have arrived so just gotta cut the old ones off!!
Pretty basic folded profiles.
Posted: Thu Jul 24, 2014 6:09 pm
by badhabit
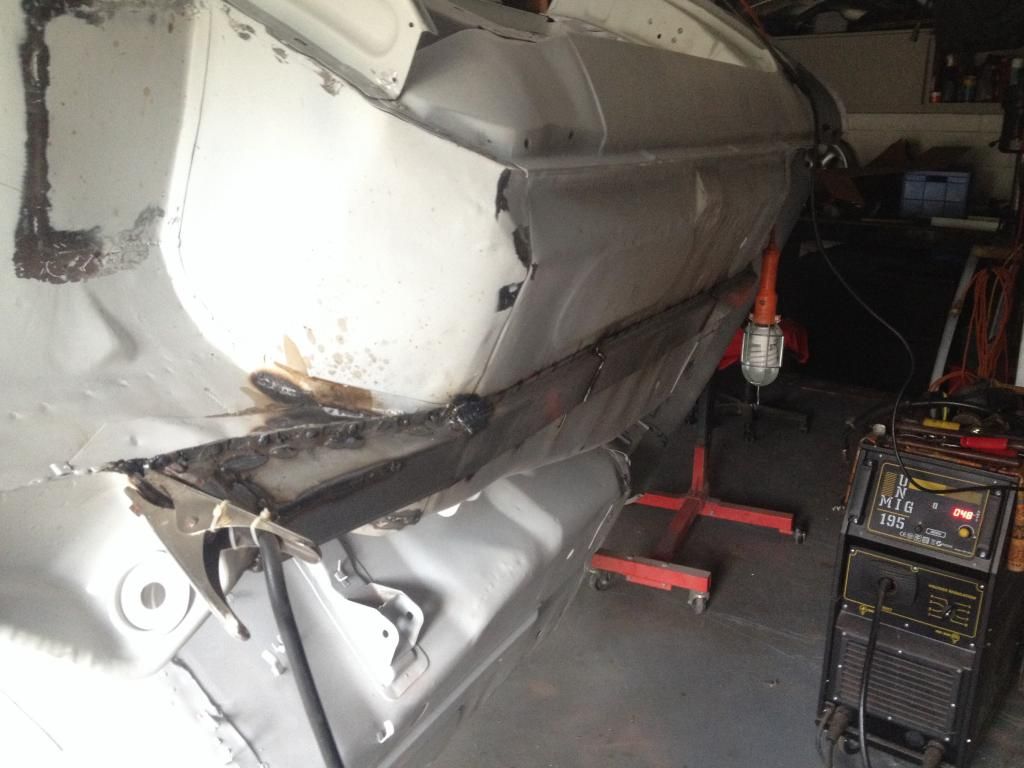
Started tackling the rails today.
Some previous repairs were less than great so cut it all off and started again!
The bottom of the rail was all the wrong shape so folded up a new base.
Next I redid the front end of the lower rail itself. This is the same profile and taper as the original now.
Much happier. This will be plug welded to the first piece.
Then the baddog rail will go over the top. Not all the that pleased with the front of the rail.
The should be made a little bigger so you can enclose the existing rail completely at the front.
Read a few reviews and most people rave about them. The do strengthen the existing chassis and the back fits well though
Posted: Fri Jul 25, 2014 9:21 pm
by badhabit
Welded in the front rail after getting the fit right. Mimicked the scalloping of the panel on the off side. Seam welded the top edge to match why had been done in the other rail.
Again lots of grinding to make it look pretty but all pretty good.
Then welded in the rear subframe connectors. Cranked up the welder so much the thermo cutout kicking in!
Posted: Tue Jul 29, 2014 7:46 pm
by badhabit
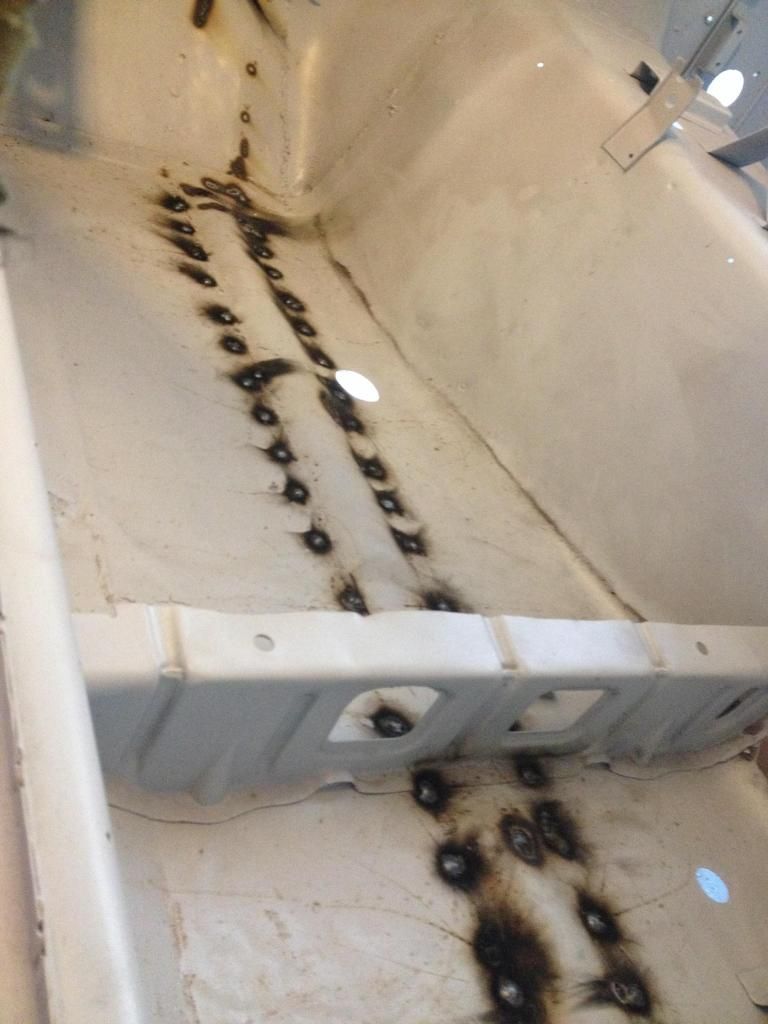
Completed the passengers side rail today.
Pretty happy with it and should add some great extra strength to the the pretty floppy floor etc.
Drilled through the floor and plug welded the rails from the inside.
The welds will be ground up and some sound deadening will go over it to cover. The underside will be ground up, seam sealed and coated in Wurth gravel stop. It's their water based underseal that gives a really nice subtle textured finish. I'm making the underside of the car the same finish as topside, yes it means having to clean it from time to time but shiney it will be!!
Posted: Tue Jul 29, 2014 7:58 pm
by ZMAD
Wicked!!
Posted: Thu Jul 31, 2014 4:51 pm
by badhabit
Drivers side rail in progress.
Had to cut and shut the front of the existing rail to lower it's profile to get the BD rail to sit well.
Still need to plug weld the rail. The floor had been pushed up previously so I've setup the new rail as flat so I can push the floor back down from the inside. Few things learnt from the passangers side.
Few steps away from getting her out of the rotisserie and on axle stands for the motor and box to setup.
Bought the new motor last week. Stock RB25det with 90ks on the clock. Cambelt / tensioners / water pump all done! Bonus!
ZR Sump and mounts all waiting too.... Need another holiday to keep the momentum going!!
Posted: Sat Aug 02, 2014 7:35 am
by badhabit
Finished up the floor / rail yesterday. Worked well, pushing the floor down to meet the much thicker BD rail.
LOTS of grinding now to make look pretty. May end up having the shell re-blasted in all the repaired areas so I can ensure those areas get the best epoxy finish possible. Forgot to mention I coated the inside of the rails before welding them on with a wax based product. Will redo when the shell is painted, get it into seams and everywhere.
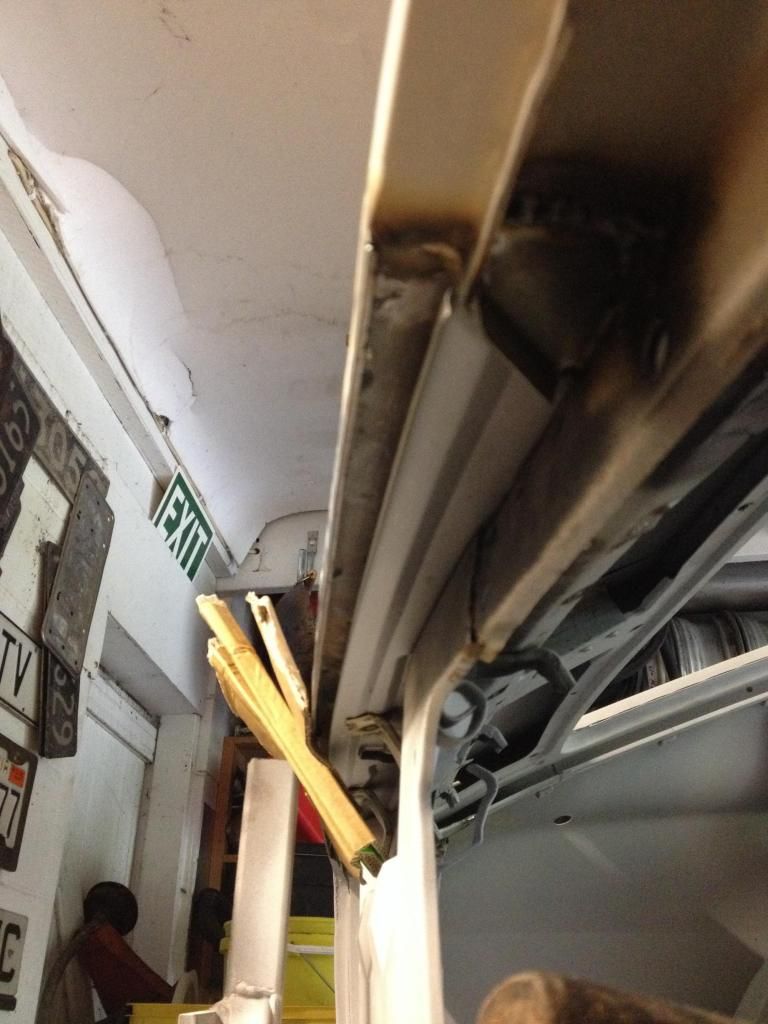
Also found this little area to fix at the back of the gutter / top of the 1/4 window.
Easy fix with only simple shape to fold up.
Rear brake kit is now here so I have all parts to setup the suspension / engine / gbox / diff.
Roll on a free weekend!!
Posted: Thu Oct 30, 2014 3:40 pm
by gaijin
nzeder wrote:Congratulations just get it done before you have more don't want to be like some of us with a 17 year project and now 4 kids
Couldnt agree more there. But as Rick said to me years ago while the misses was pregnant, its all good, give it a few years once they are out, then get back into it.
Posted: Thu Nov 06, 2014 10:50 pm
by badhabit
Well since having our little one arrive 7 weeks early I haven't done anything on the Z but have purchased a few things to make life easier when completing it.
Wiringspecialties datsun to RB25 loom. Plug and play! New engine sits awaiting mockup.
And because I was getting bored and needed some stimulation I bought something new!!
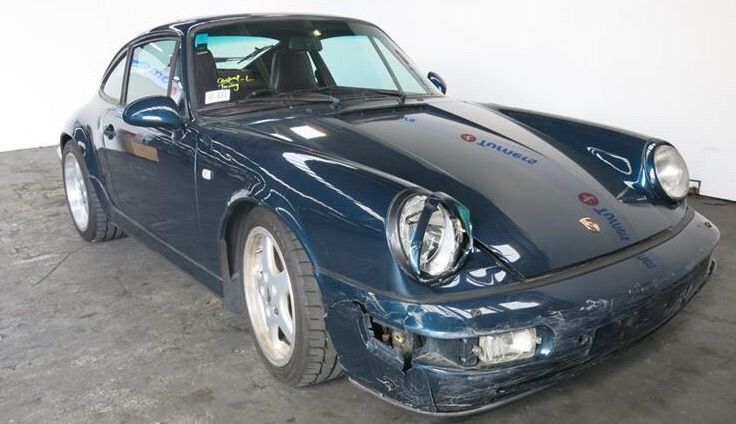
Call it a midlife crisis car?? Or just appreciation of another piece of precious metal!!!
Always wanted one and now is the time to enjoy things with new family. This came up in a tender.
Needs a few small repairs and revinn but will be a great weekend driver until the z is done.
1992 C4 911. 5spd. 3.6L engine. 4wd.